Hello, we are happy to have you on board!!!
At Closer, our top priority is ensuring you keep up with all meetings. That's why we've created a step-by-step beginner's guide to help you ease into the Closer experience.
A friendly reminder before getting started: use this guide once you have been properly onboarded by one of our Closer team members. If this is your first time accessing the Meeting Tool, feel free to contact us for a personalized Closer onboarding experience.
WELCOME TO THE CLOSER MEETING TOOL
This guide will walk you through all the different features inside the tool:
Meeting Tool Dash-board
Upload Meetings
Record from the tool
Transcript & Translation
Documents
Templates
Tags
Integration with the CRM
DASHBOARD
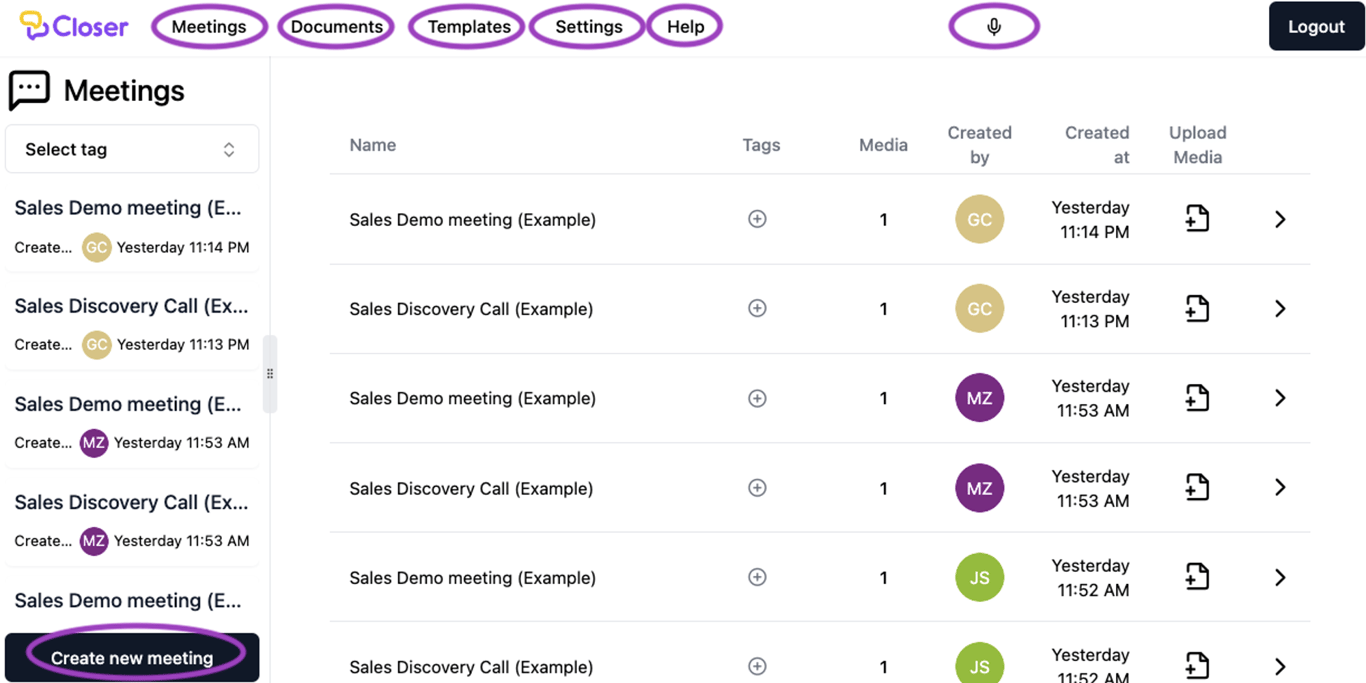
Once you have created your Closer Meetings account, the initial view will be something similar to this.
If you are new to the tool, one meeting called "Sales Demo meeting (Example)" will be preloaded. This is an example meeting, to show all the tool features in action.
The initial Closer meeting Dashboard view is where all your uploaded meetings will be displayed and all future ones can be managed.
NOTE: Important buttons have been circled in purple for you to keep in mind.
MEETINGS
Create a new Meeting for every ongoing project on your team. Inside each meeting, you can upload and store numerous meeting recordings.
A good example of this would be naming a new meeting "Interviews for Project Manager Role", then inside you could manage all your meetings regarding this specific project.
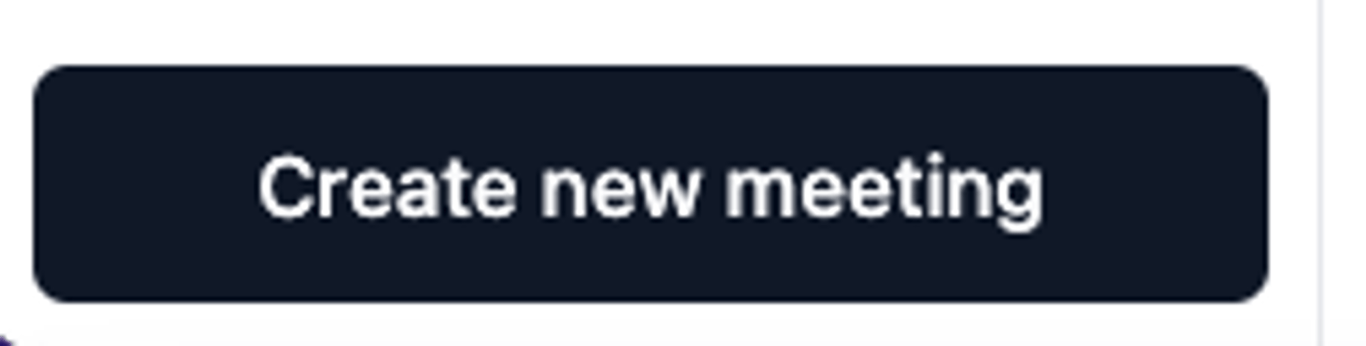
To get started, click on the "Create new meeting" button located on the bottom left of your dashboard.
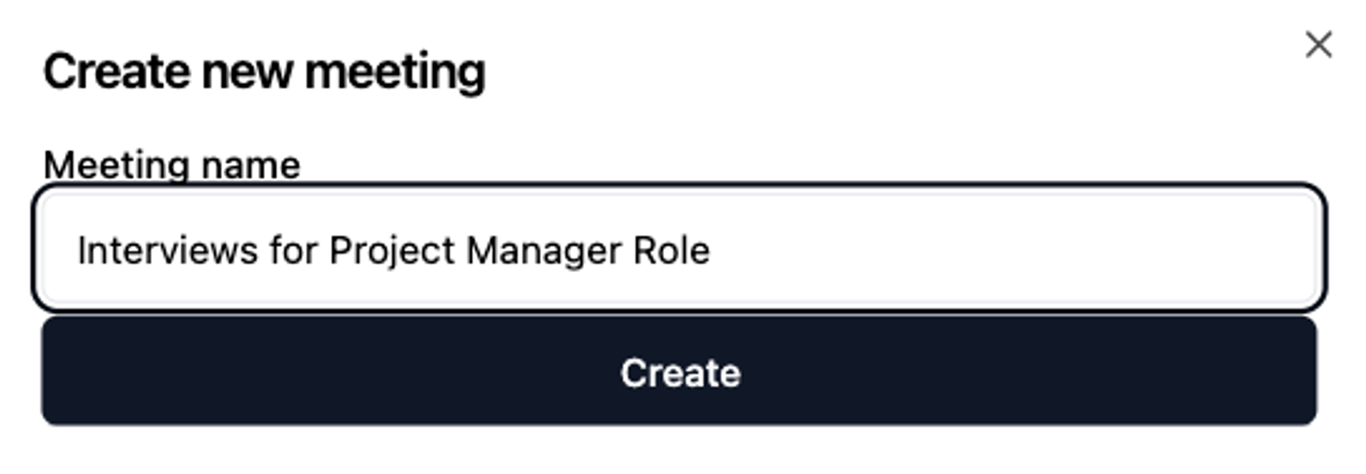
Name your new meeting and click "Create."
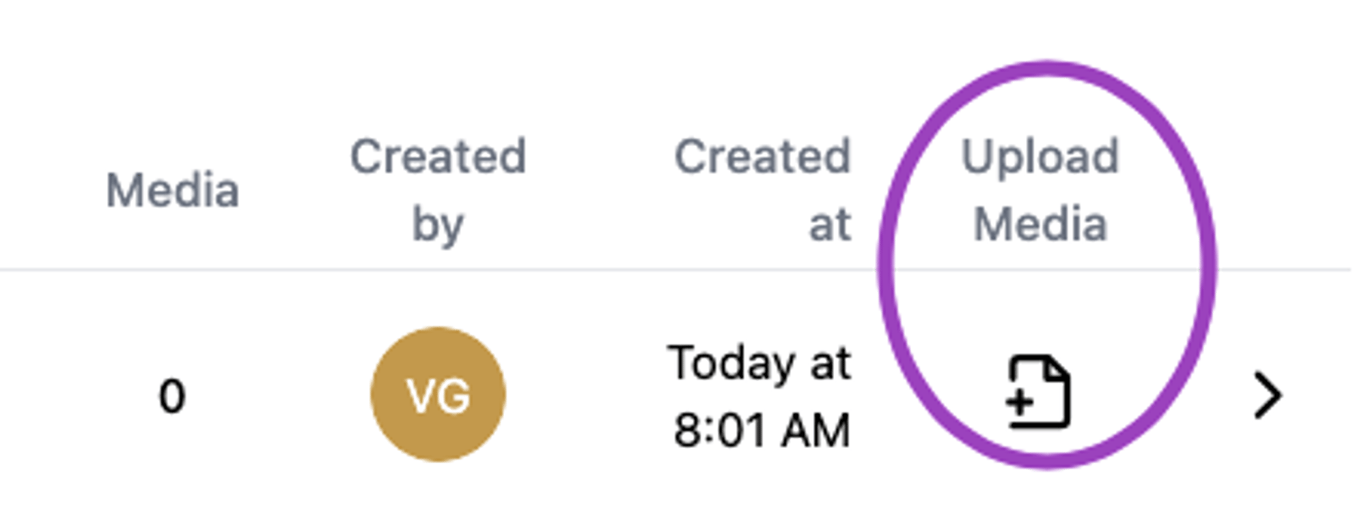
The new meeting will display at the top of your dashboard.
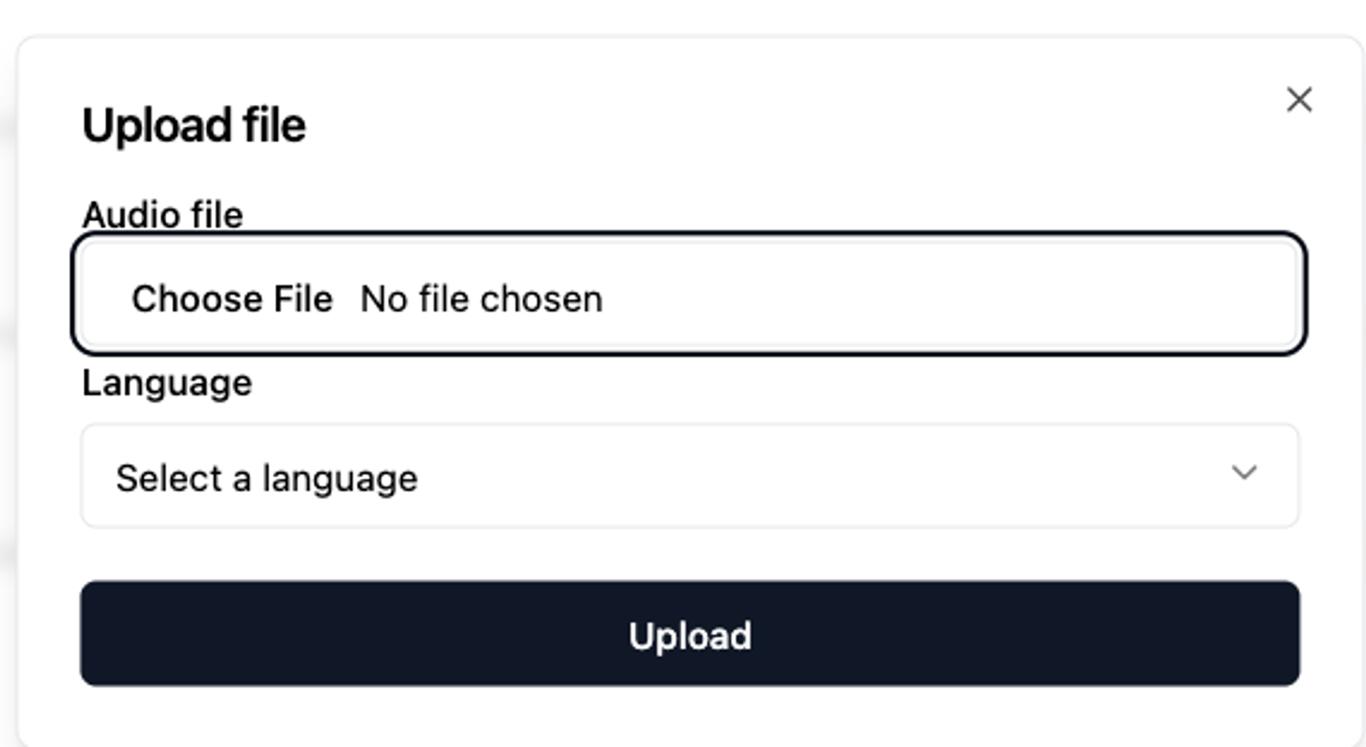
Time to upload the meeting recording. Click the "Upload Media" button, name your recording, select the original language, and upload.
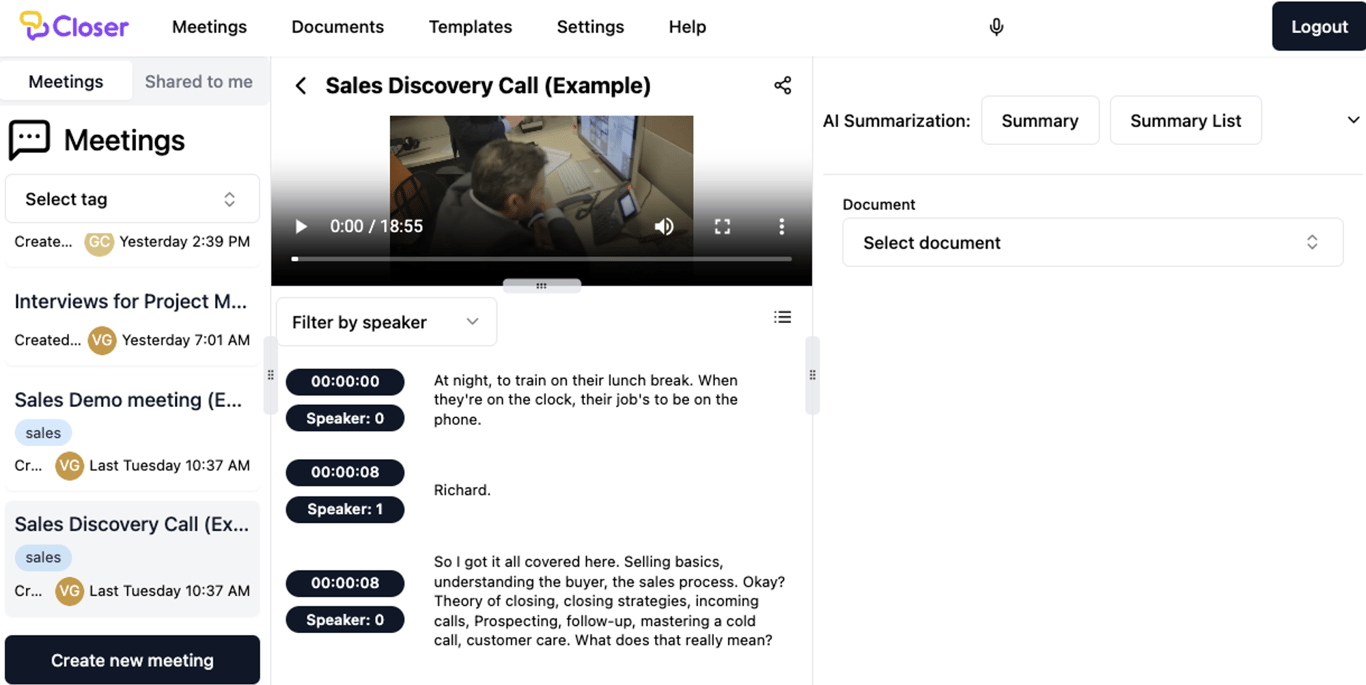
Meeting View, once the video has been upload
RECORD DIRECTLY FROM THE MEETING TOOL
If you want to reduce the time spent recording from Zoom or Meets and then uploading your video recording to the Meeting Tool, consider recording your meeting directly from the tool.
Next time you have a meeting:
Click the microphone icon on the top right part of your tool.
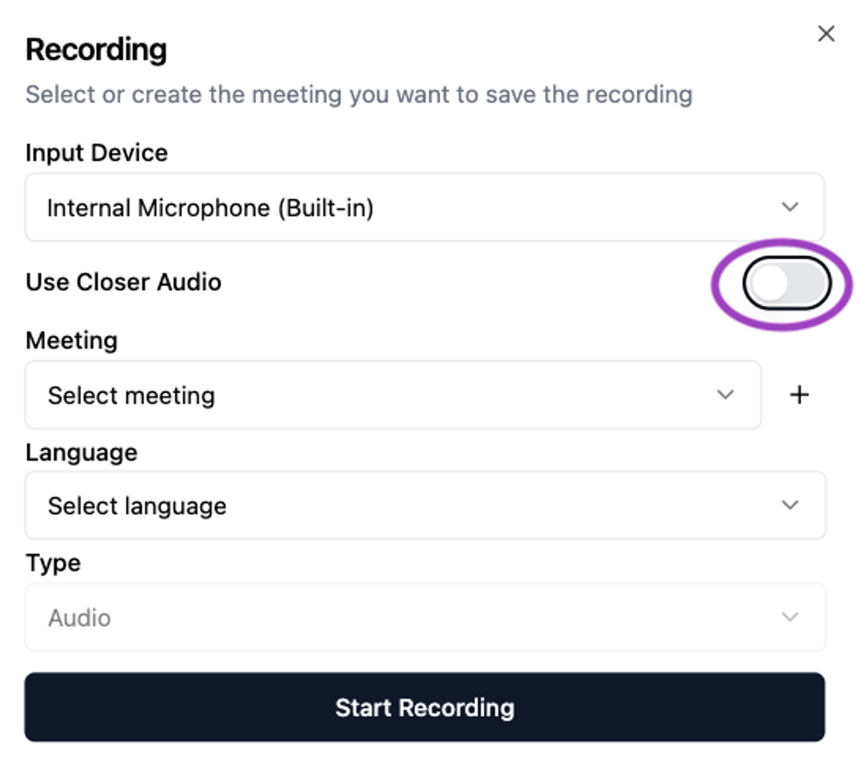
Choose the Input Device, turn off the "Use Closer Audio" button, select the meeting where you wish the recording to be saved or create a new one, select the language in which the meeting is being held, and click Start Recording.
The recording will begging, as shown on the top right side of your tool.
Once you finish the recording, it will automatically save on the Meeting tool you created. Go back to your dashboard and search for the corresponding meeting, open it, and the meeting recording will appear.
TIP: Keep in mind this tool does not announce that the meeting is being recorded.
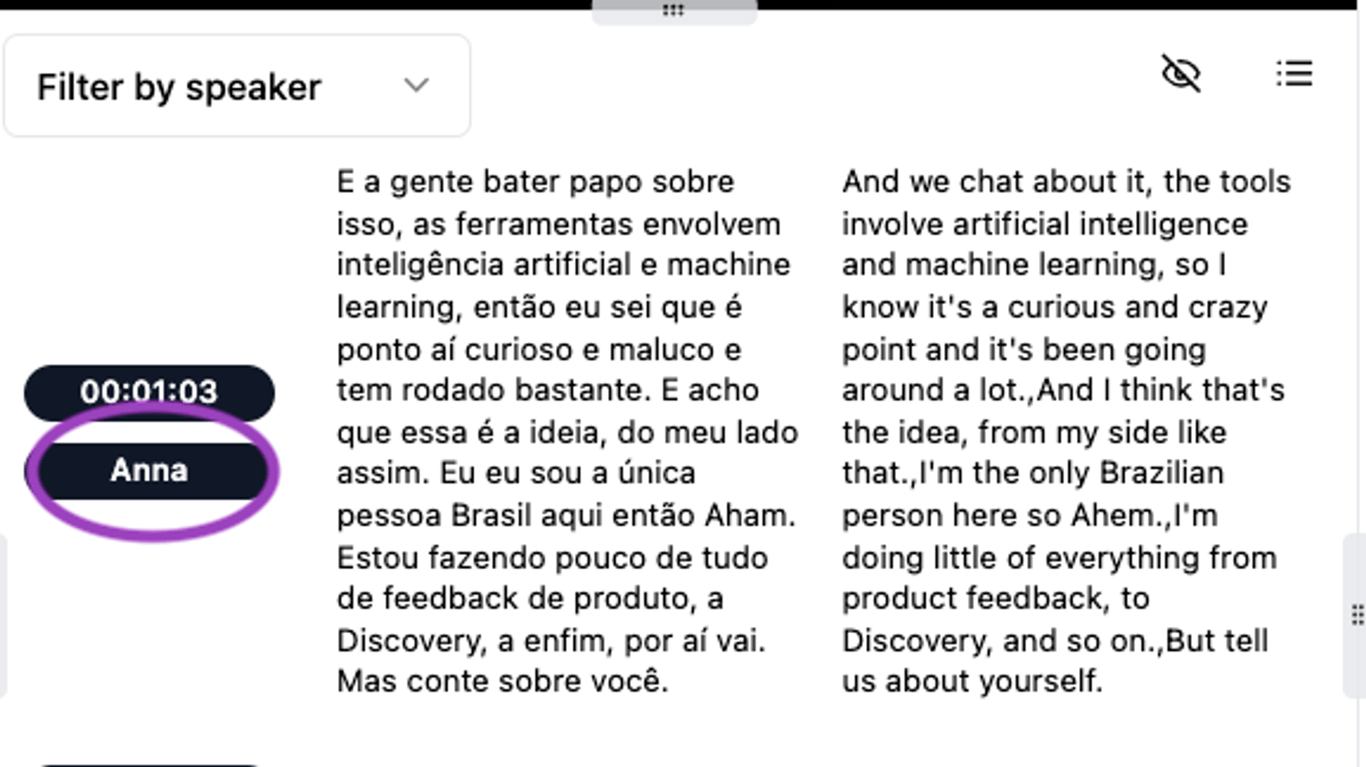
TRANCRIPT & TRANSLATION
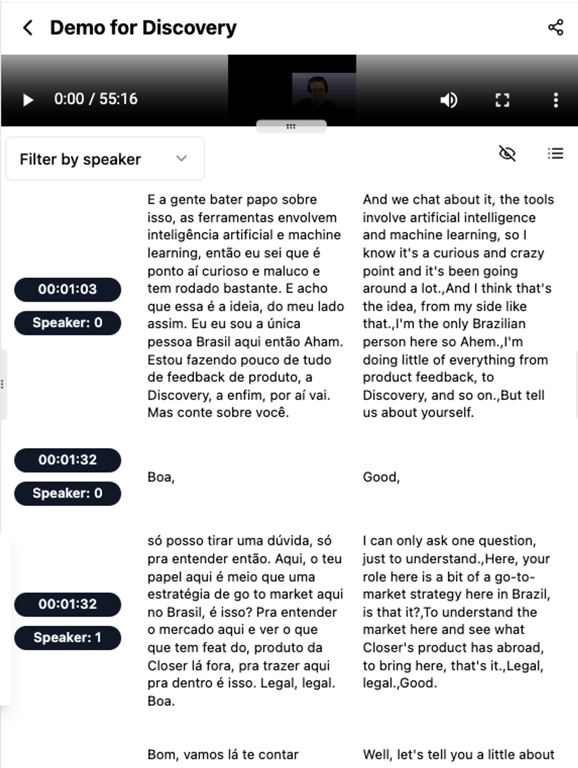
The meeting tool always would generate the transcript of your meeting recordings. If the meeting was originally hold on Spanish or Portuguese, automatically translation to English will be offer.
TIP: Name the speakers to not lose track of the conversation. Click on top of the speaker number you wish to change and write the name in the pop-up window, then save changes. Now instead of speaker 0, the name will appear.
DOCUMENTS
Documents will help you keep all your meeting notes organized, right next to every meeting recording you have uploaded or created.
There are two ways to create a Document inside your Meeting Tool:
Create from the dashboard view
Create next to the meeting recording
Both methods yield the same result; it just depends on whether you are planning ahead or working on the spot.
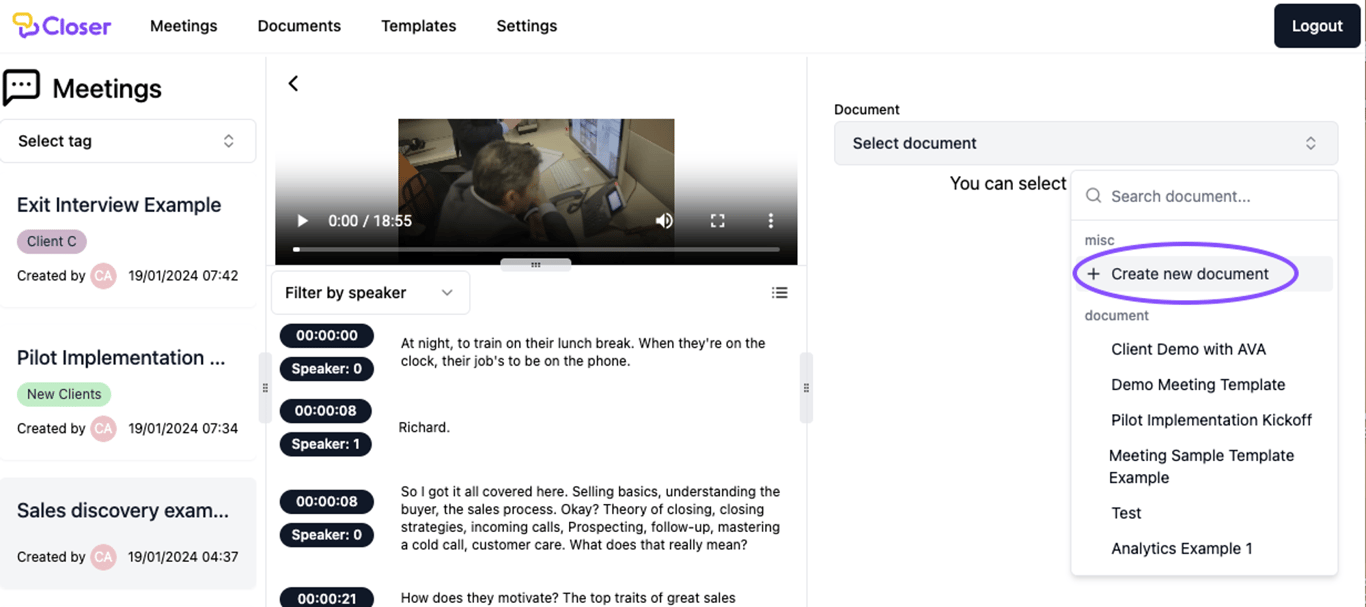
Once you have your meeting uploaded, click on "Select document" and then on "+ Create new document".
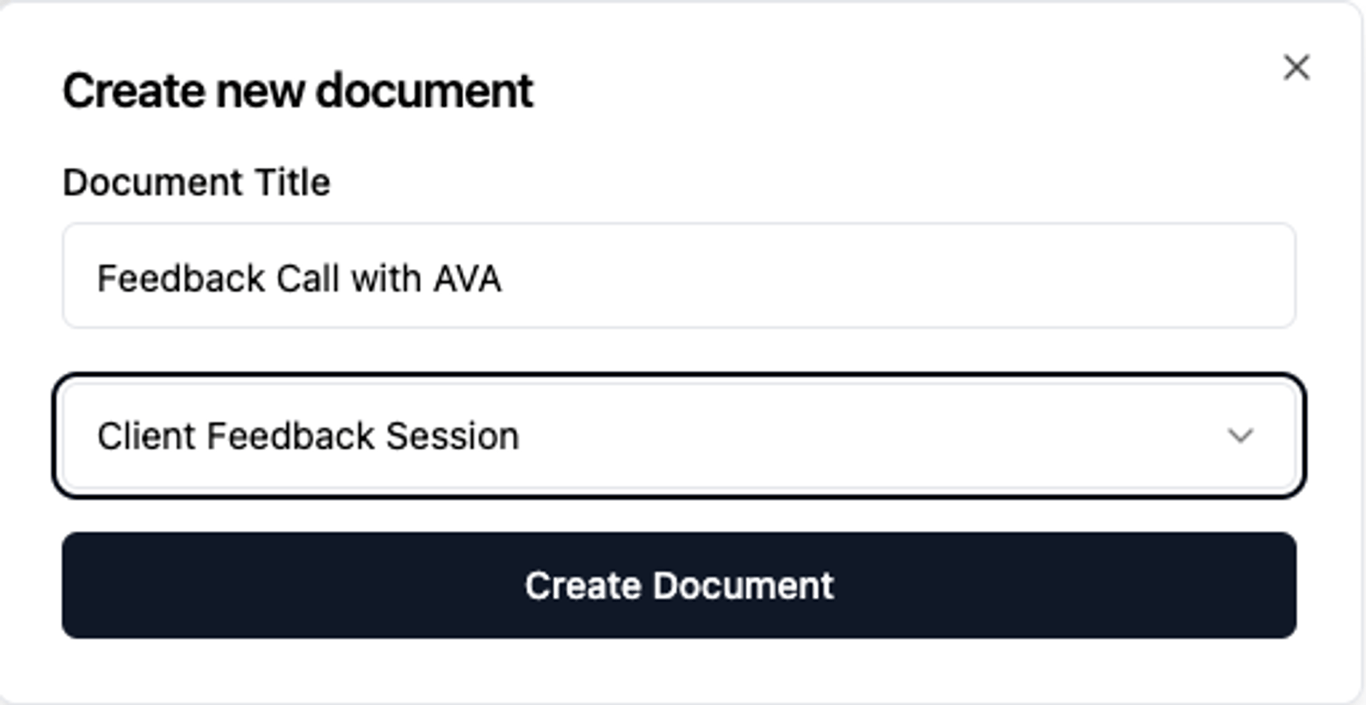
Name your document, select your desired template, and click "Create Document".
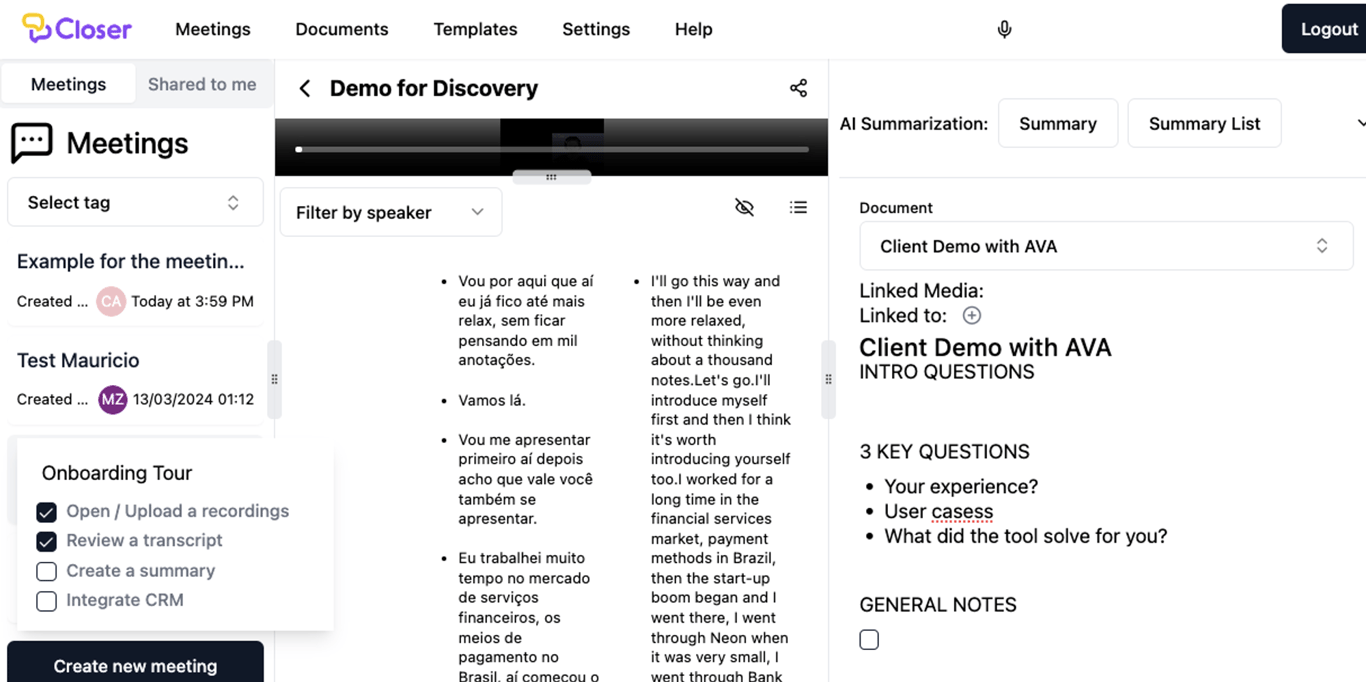
The document and template will immediately display and be ready to be filled with all your meeting notes and ideas.
When writing your document, you can also link transcript segments in the middle of your note-taking.
Open a checkbox or a bullet point in your document. Click on the transcript and hold, move your mouse, and click on the + icon that appears when you put the cursor on top of the checkbox. The transcript segment will now be linked to your document.
TIP: introduce simple commands to get the best experience when note taking.
[] - for check box
+ - for bullet point
# - for letter size, one for the smallest and three for the biggest.
TEMPLATES
Meeting templates are an excellent feature to get ahead on meeting note-taking. Prepare as many note templates as possible before the meeting starts. When needed, input the desired template and start taking notes immediately, with a preset document structure to follow. This will surely keep your team more aligned with the information.
Let's continue with the example about "Interviews for Project Manager Role". When interviewing for a specific role, your team will need to follow a specific agenda for every interview that will be performed. In this case, creating a template that anyone on your team can follow would ensure homogeneous meeting notes are taken.
Once you have selected "Templates" from the top bar menu.
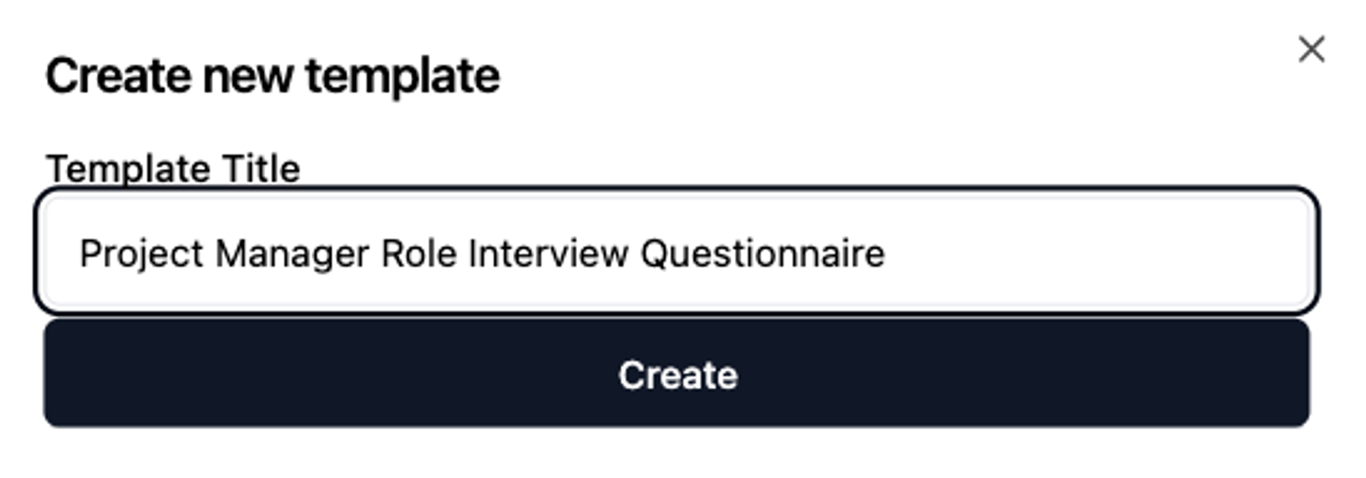
Click on the "Create New Template" button, write a name, and click create.
The new document template will be displayed at the beginning of the Templates display.
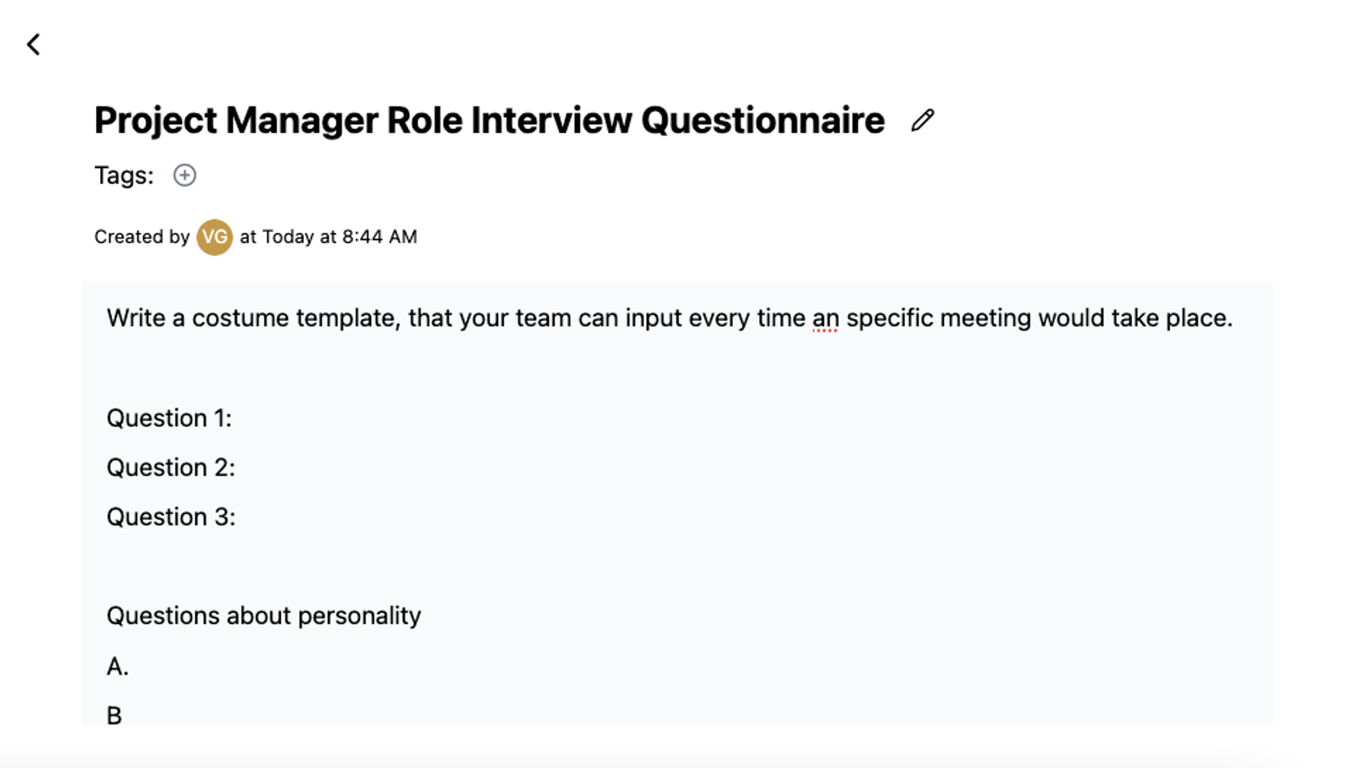
Click the arrow at the end and open the new template. An empty canvas, for you to start creating your personal structure, will be displayed.
Write a simple sketch or outline and specify timestamps on how to guide a meeting. Either way, the meeting template can be completed and notes can be added every time a new meeting takes place.
TAGS
Tags are the coolest feature when you want to immediately spot what a meeting, document, or template is about.
Create as many tags as your team will need to get organized, input as many tags as your team needs to easily spot and understand what the meeting is about.
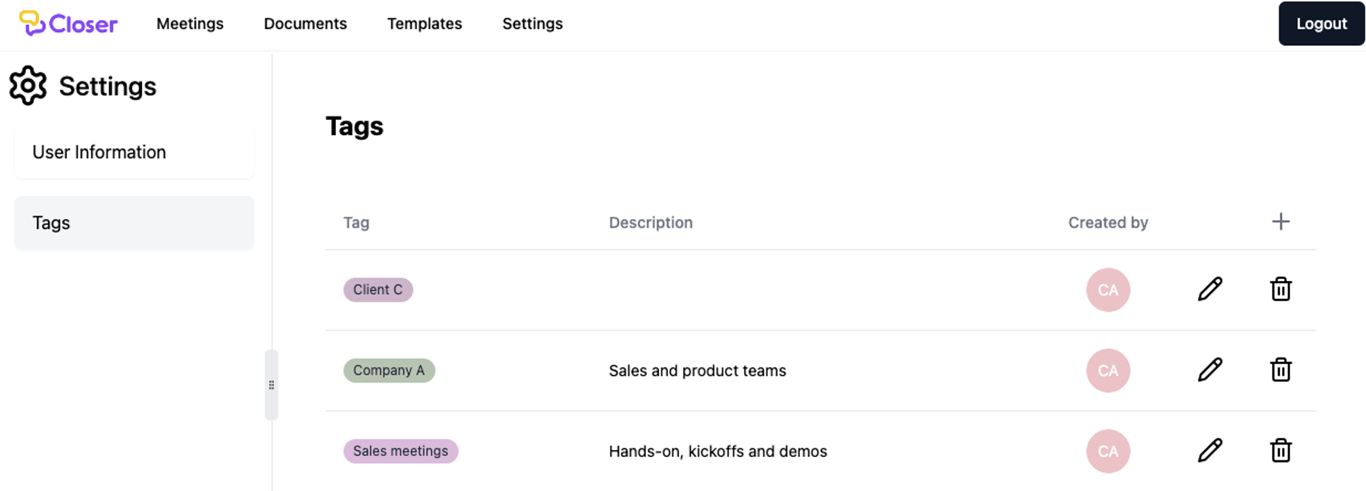
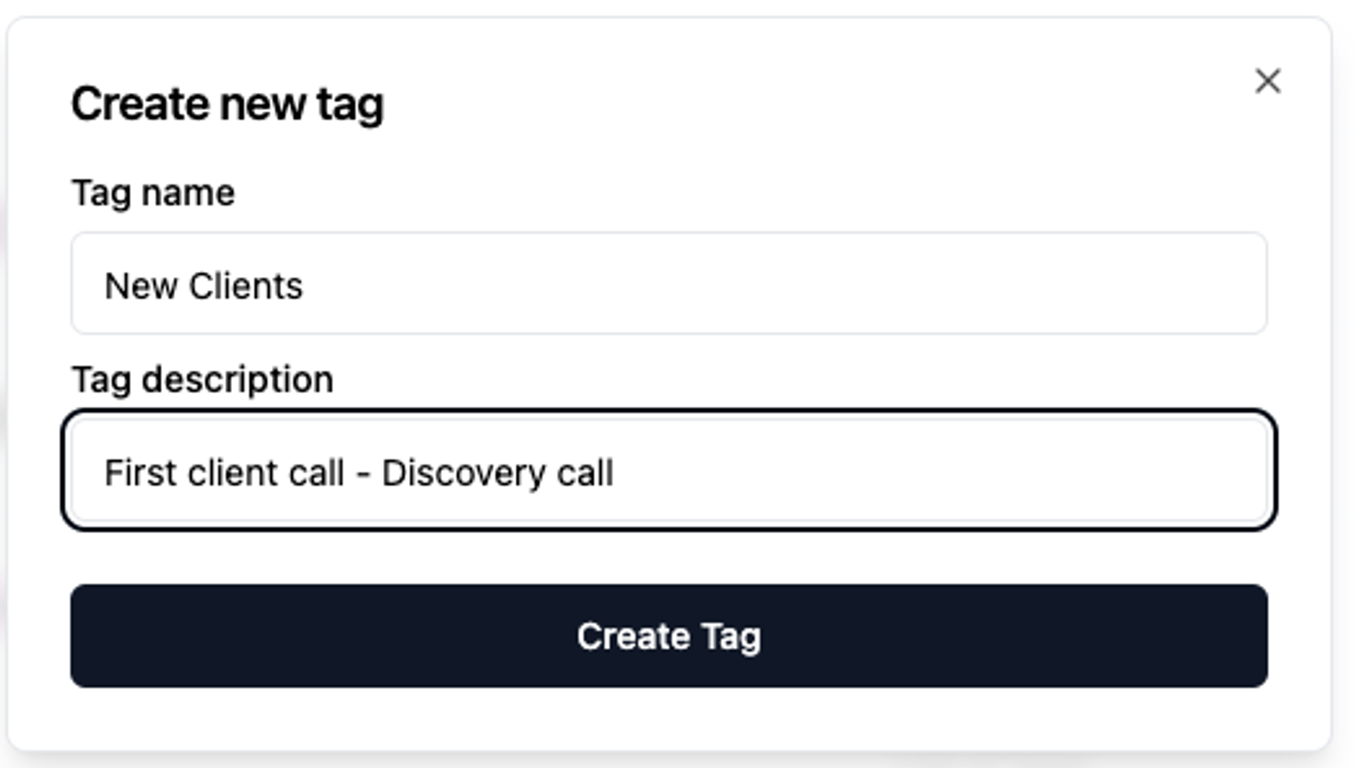
To create tags, go to settings and select Tags.
Click the "+" icon, name your new tag, write a short description, and click "Create Tag."
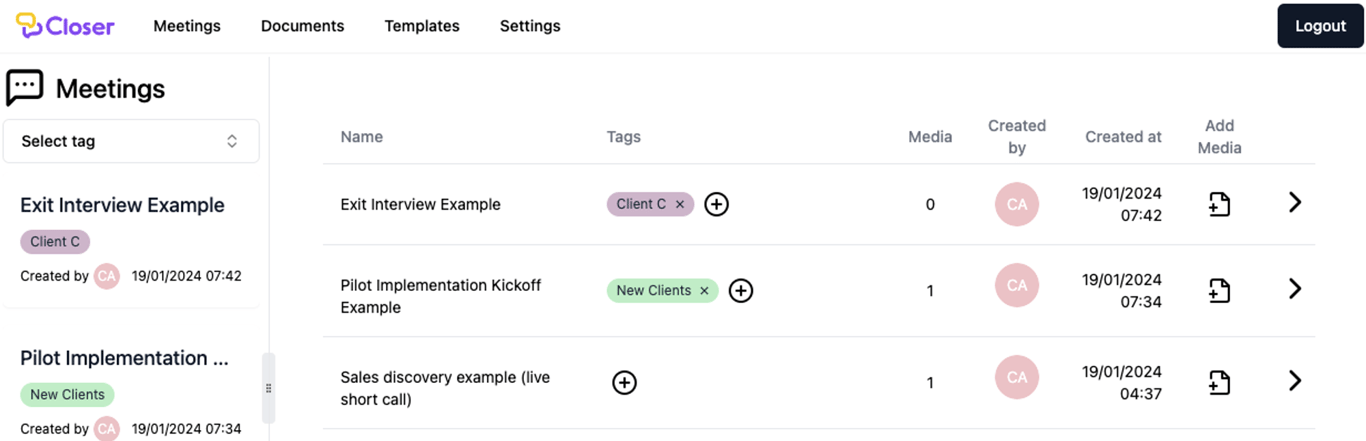
Go back to the dashboard view, click on the "+" icon under the Tags column, and input your tags.
TIP: Tags can be input to, Meetings, Documents and Templates, and never loose track of what´s important.
INTEGRATION WITH CRM
Never loose connection of whats important and connect your meeting tool with your Hubspot or Salesforce account. Go on setting on the menu bar
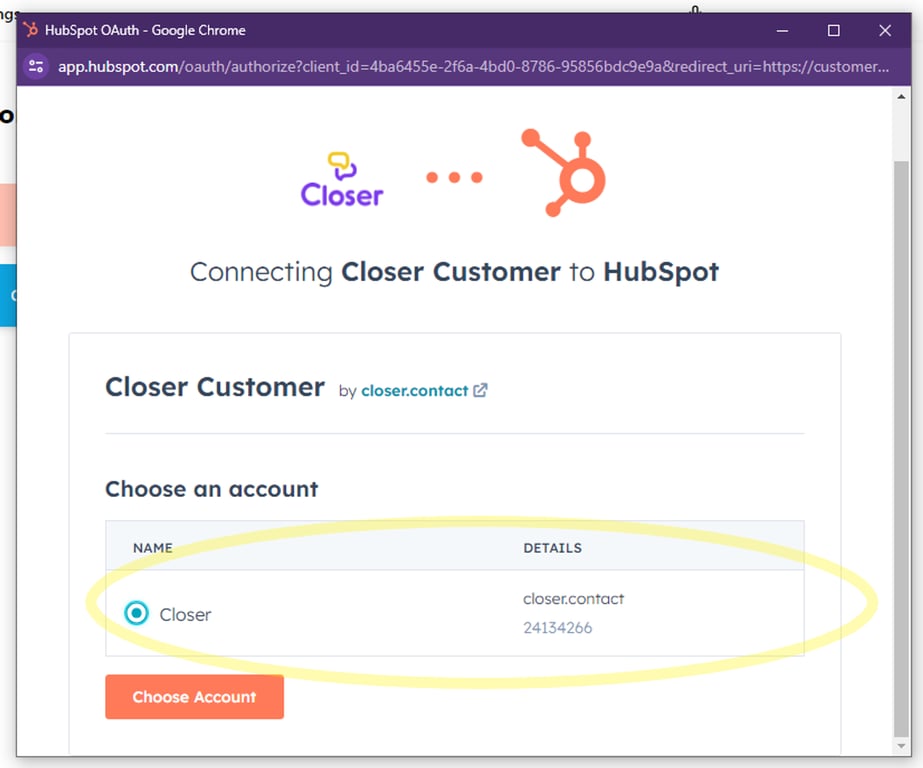
Select the CRM you wish to connect.
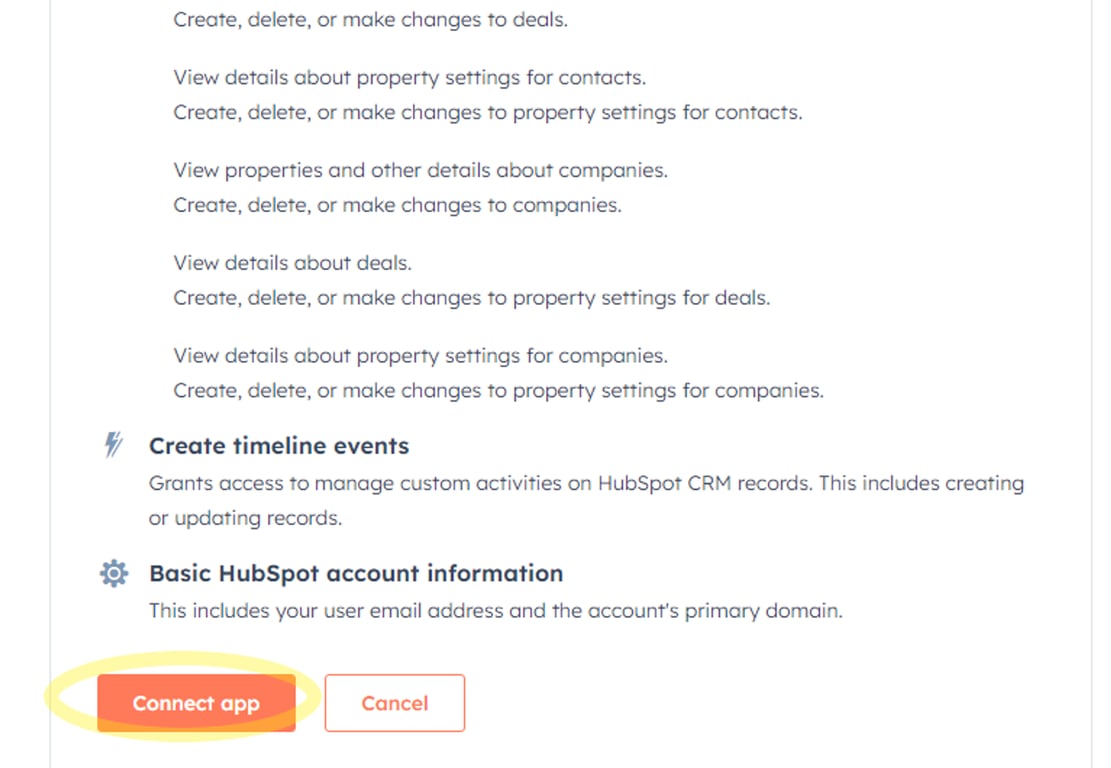
A new window from your CRM should pop up. Select your account and follow the steps within the CRM (pictured here: HubSpot)
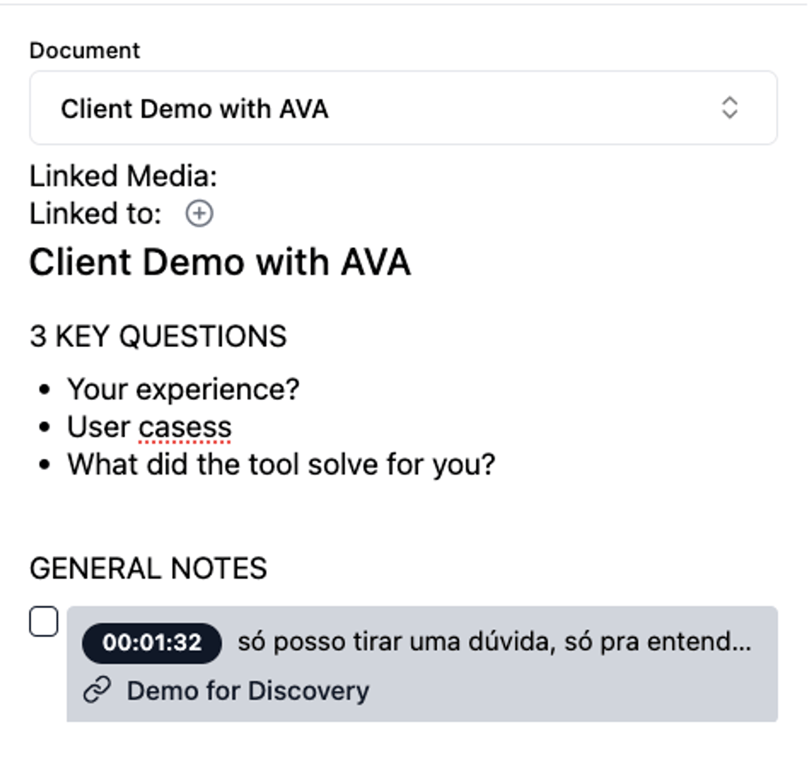
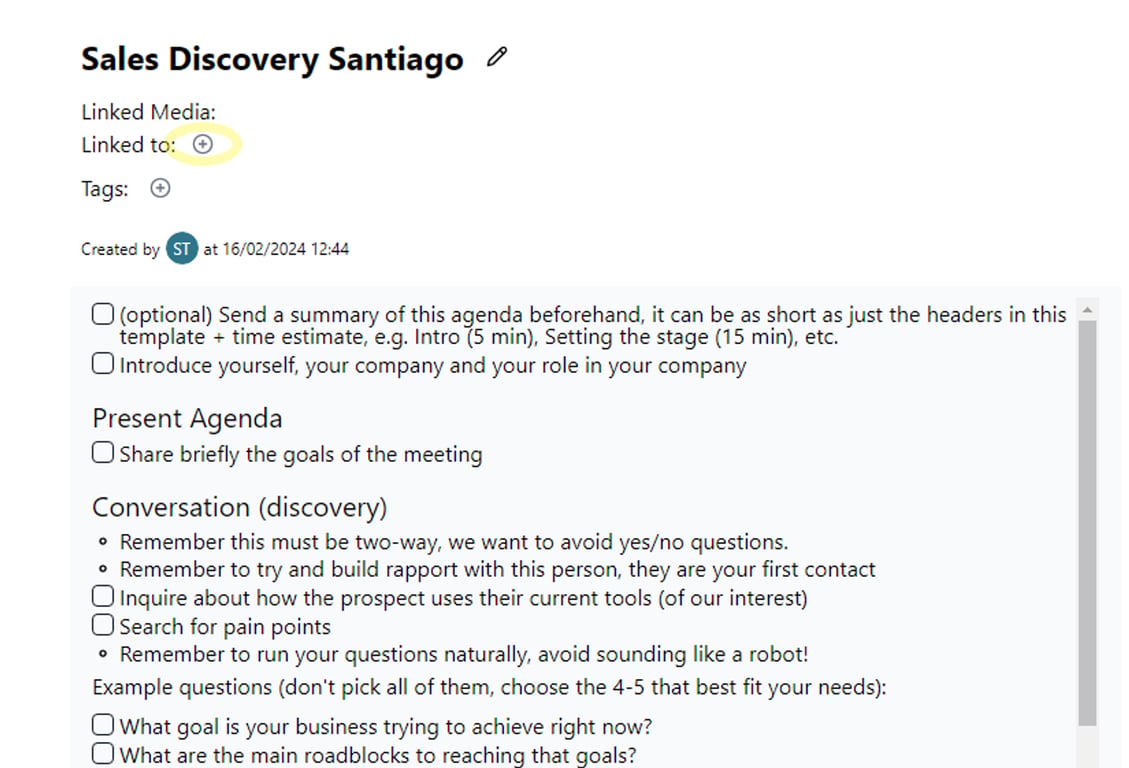
Once the CRM is integrated, you can connect a document to a specific CRM object.
Enter a Document and click on the new Linked to plus button:
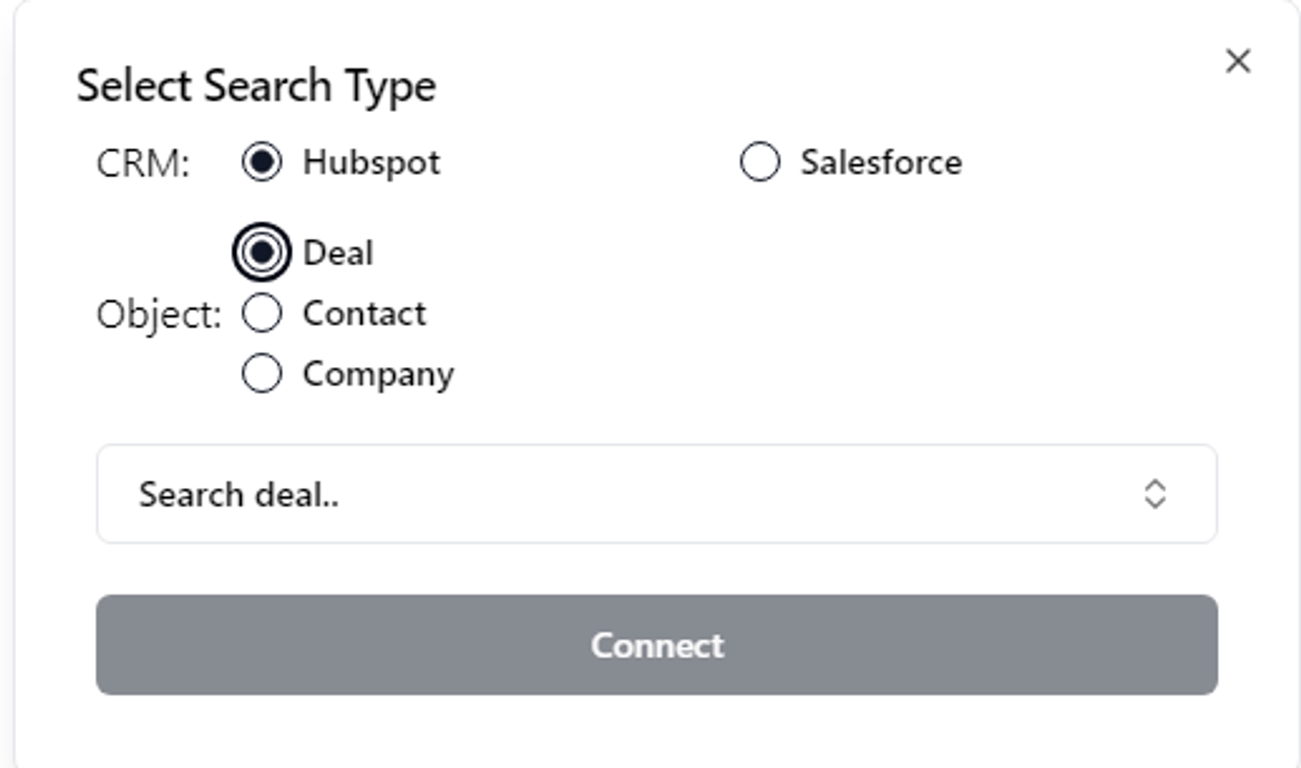
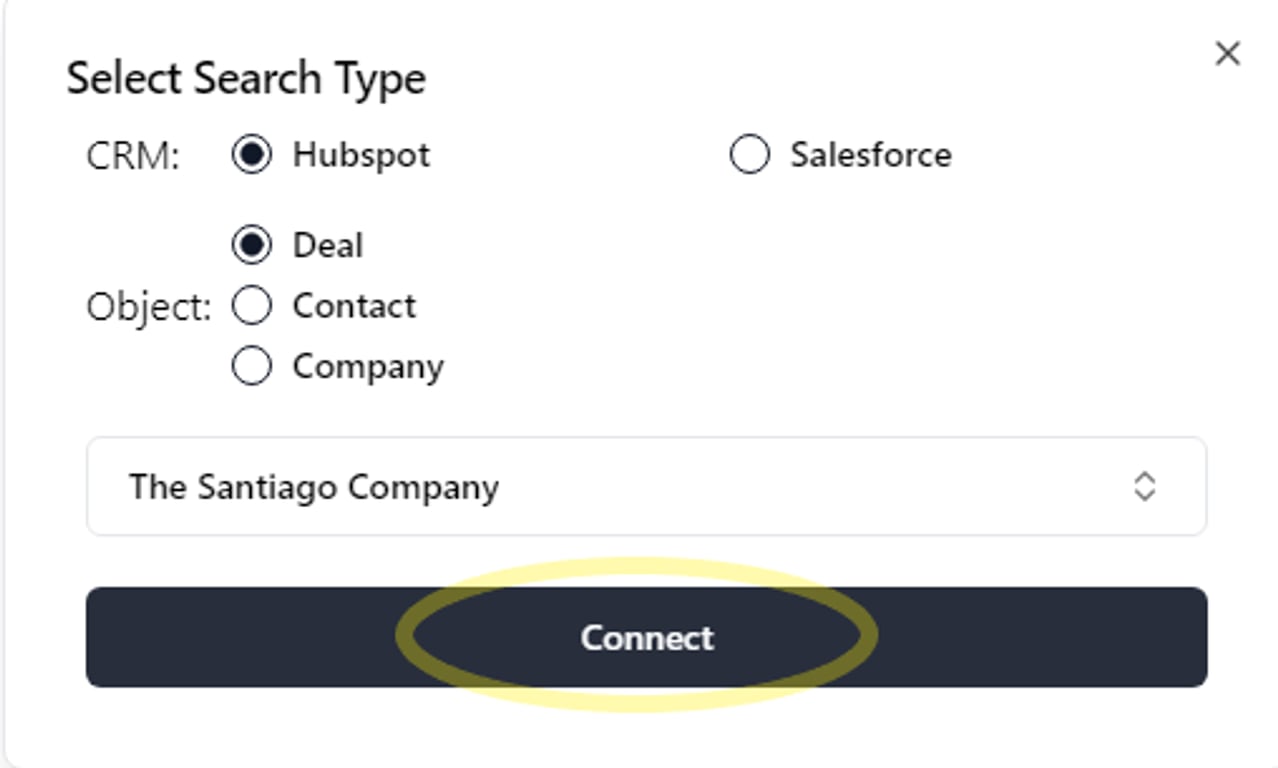
A small pop-up will prompt you to choose the CRM, the type of object and to search the object, select the object and click on Connect
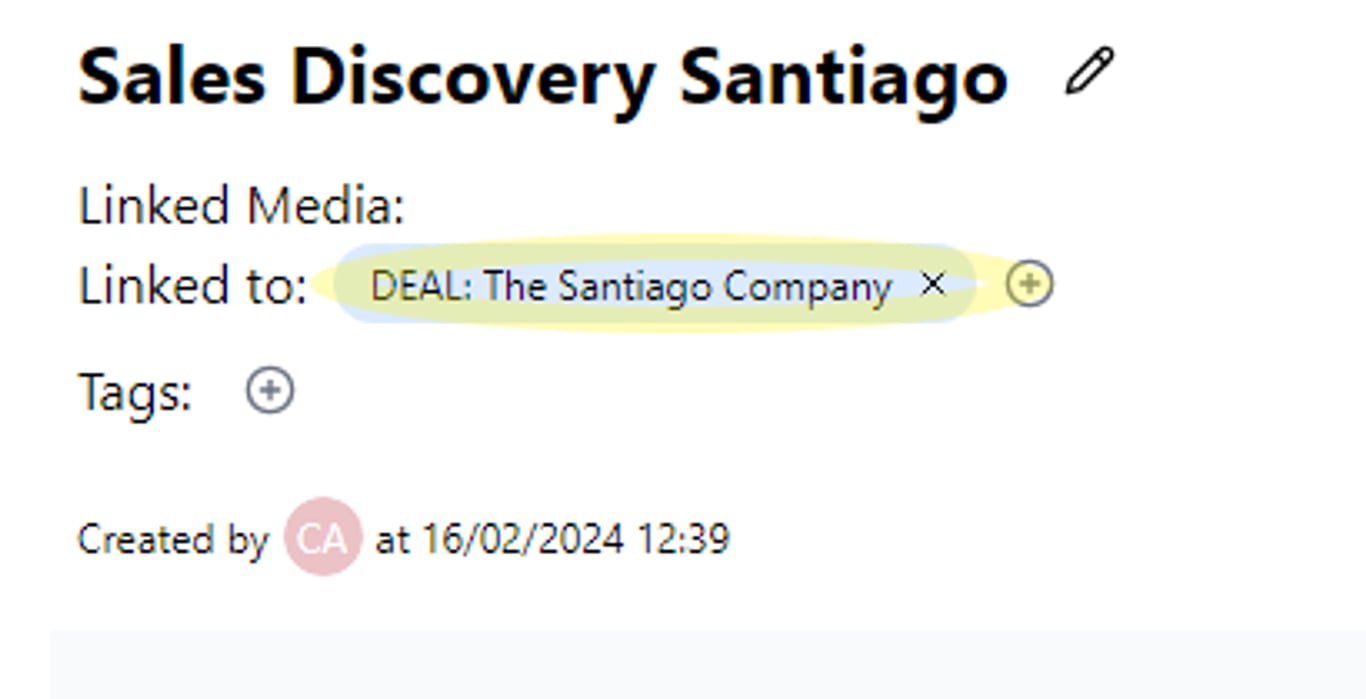
The document should now be connected to the CRM. The small badge with the object name will appear in the Document page and the Document in Meeting page. Clicking on the badge will open a new tab on the CRM object itself: